
Calculating weather delays in construction: A comprehensive checklist

How to report a climate-related delay effectively
Weather can be the most unpredictable element in a construction project. Yet, many project managers still lack a systematic way to calculate and report weather delays in construction.
This guide offers a detailed checklist to help contractors, project managers, and site supervisors calculate, document, and mitigate the risk of weather-related delays effectively. Whether you're bidding on a new project or troubleshooting issues on a current one, this comprehensive resource will keep your timeline weather-resilient.
Why it matters: The cost of weather delays
Before diving into the checklist, consider this: weather is one of the most common and costly sources of disruption in construction projects worldwide. From unexpected rainfall and windstorms to extreme heat or cold, adverse conditions can halt work, compromise safety, and throw entire schedules off track.
These delays often trigger a chain reaction—affecting crew availability, subcontractor coordination, material logistics, and client expectations.
That’s why having a consistent, data-driven approach to identifying and calculating weather-related delays is not just useful—it’s essential for delivering projects on time and maintaining professional credibility.
The step-by-step checklist for managing construction delays
Weather disruptions can derail even the most carefully planned construction schedule. But with the right systems in place, their impact can be measured, managed, and even minimized. The following checklist walks you through every essential step—from setting up your schedule and identifying weather-sensitive activities to logging conditions on-site and issuing delay notifications.
Use it as a practical guide to take control of weather-related risks before they take control of your project.
1. Baseline the construction schedule
Why: You need a clear reference point to assess what qualifies as a delay.
How:
- Establish a detailed project schedule, broken down into weather-sensitive and non-weather-sensitive tasks.
- Include float time and critical path activities.
- Use scheduling software like Primavera P6, Microsoft Project, or cloud-based tools like Procore or Buildertrend.
Tip: Clearly define what constitutes a “workday” in your contract (e.g., 8 hours of uninterrupted work without weather disruption).
2. Identify weather-sensitive activities
Why: Not all construction tasks are equally affected by weather.
How:
- List all outdoor and indoor activities.
- Flag weather-dependent activities like concrete pouring, roofing, exterior painting, crane lifts, or foundation work are weather-dependent.
- Note seasonal constraints (e.g., cold-weather concrete curing).
Tip: Categorize these tasks in your schedule using tags or filters to make adjustments easier when delays occur.
3. Incorporate historical weather data
Why: Knowing what’s “normal” helps establish reasonable expectations.
How:
- Access historical weather data from reliable sources like NOAA, local meteorological services, or private weather analytics providers.
- Gather data for the same geographic area, preferably for the last 5–10 years.
- Focus on days lost due to precipitation, wind speed, temperature extremes, and visibility issues.
Tip: Use historical averages to build contingency days into your schedule in advance.
4. Define “excusable” weather events in the contract
Why: Clear contractual language prevents disputes.
How:
- Work with legal counsel or contract managers to specify excusable vs. non-excusable delays.
- Include definitions and thresholds (e.g., rain > 10mm/hour, wind > 30 mph).
- Clarify time extensions and notification requirements.
Tip: Use standard contract templates (e.g., AIA, FIDIC, or NEC) as a starting point, but tailor to the local climate and job specifics.
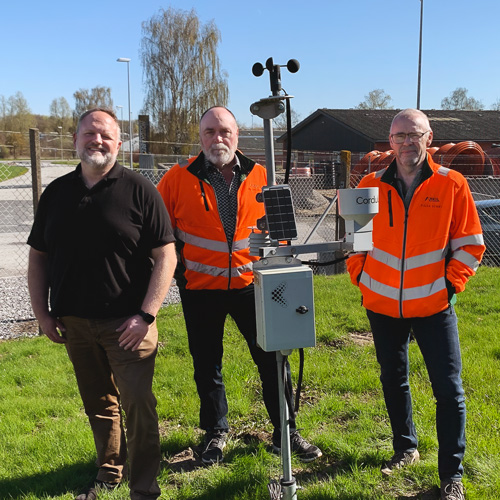
5. Use on-site weather monitoring tools
Why: Hyperlocal data is more accurate than regional weather reports.
How:
- Install on-site weather stations or use IoT-based sensors that record real-time data like rainfall, wind, and temperature.
- Choose stations with API integrations into your project management system.
- Ensure calibration and maintenance are performed regularly.
Tip: Cloud-connected solutions can send alerts and automatically log conditions, making reporting easier.
6. Log daily weather conditions and site impact
Why: Documentation is key for claims and analysis.
How:
- Assign a site manager or superintendent to fill out a daily log.
- Record:
- Date and time of weather events.
- Impacted activities.
- Work stoppages or safety risks.
- Supplement with photos and sensor data.
Tip: Use mobile apps to streamline field logging—many integrate with your central project dashboard.
7. Establish a delay threshold policy
Why: Not all weather events warrant schedule changes.
How:
- Define thresholds in your project plan (e.g., more than 2 hours of stoppage in a day = partial delay).
- Determine whether cumulative minor delays can add up to a full-day delay.
- Set criteria for what justifies requesting a time extension.
Tip: Document your thresholds in a project execution plan and communicate them to subcontractors.
8. Track cumulative weather delay days
Why: Long-term tracking helps detect patterns and supports claims.
How:
- Use Gantt chart overlays to visualize weather impact over time.
- Keep a running tally of lost days vs. planned float.
- Use earned value management (EVM) techniques to measure deviation.
Tip: Some scheduling tools offer weather impact simulations—use them to test what-if scenarios.
9. Issue timely delay notifications
Why: Contracts often require prompt notice to validate delays.
How:
- Set up a standard form or digital template for weather delay notices.
- Include:
- Description of the event
- Impacted tasks
- Forecasted recovery plan
- Send notifications within the contractual window (often 7 days or less).
Tip: Keep a copy of sent notices and responses in a centralized document management system.
10. Request time extensions and adjust the schedule
Why: A formal schedule update reflects new realities and helps maintain stakeholder trust.
How:
- Submit a Time Extension Request (TER) based on logged data and delay calculations.
- Revise the project schedule with updated milestone dates.
- Reallocate resources if necessary to optimize recovery.
Tip: Use the delay analysis method agreed upon in the contract (e.g., Time Impact Analysis, Windows Analysis, or Contemporaneous Period Analysis).
11. Mitigate and recover where possible
Why: Not all delays are unavoidable—proactive management makes a difference.
How:
- Explore alternative work sequences or weekend shifts.
- Use weather-resistant materials or techniques (e.g., heated concrete blankets, tented scaffolds).
- Increase crew size or equipment during favorable windows.
Tip: Keep the client informed about mitigation efforts—they’ll appreciate the transparency.
12. Conduct post-project delay review
Why: Lessons learned help future planning.
How:
- Review all weather delay logs and compare forecasted vs. actual impact.
- Identify areas where contingency was insufficient.
- Update your internal best practices based on findings.
Tip: Turn your findings into a case study to share across teams or bid proposals.
Smart planning, less downtime: Your payoff for getting weather right
Weather will always be a wildcard in construction—but how you prepare for and respond to it doesn't have to be. By following this checklist, you can better manage risks, protect your schedule, and build trust with stakeholders.
Taking a structured, data-driven approach doesn't just minimize disputes, it positions your company as reliable, professional, and forward-thinking. Plus, it helps minimize damages, lower costs, and reduce lost time—who wouldn’t want that?
Published:
May 14, 2025
Latest posts
.webp)
%20(1)%20(1).webp)
.webp)


%20(1).webp)


.webp)

.webp)


.webp)

_web.webp)


.webp)


Trusted by thousands of customers, Cordulus provides accurate and reliable weather information to decision makers when it matters most.